Table of Contents
- Why Preparation Matters for Your Insurance Adjuster Roof Inspection
- Create a Roof Damage Documentation Checklist Before the Inspection
- What to Say to Insurance Adjuster for Roof Damage
- Understanding Your Roof Inspection Report for Insurance
- How Long Does a Roof Insurance Claim Take After Inspection
- Practical Steps to Prepare Your Property and Home
- Day-of-Inspection: What to Expect and How to Help
- Conclusion
Last Updated: August 25, 2026
Why Preparation Matters for Your Insurance Adjuster Roof Inspection
Getting ready for an insurance adjuster roof inspection is critical to your claim’s success. Adjusters process dozens of claims monthly, spending 30 to 60 minutes on-site (iii.org). In that window, clear evidence, organized documentation, and direct communication determine whether your claim gets approved quickly or delayed. The difference between thorough preparation and a scattered approach can mean thousands of dollars in coverage.
At DGK Home Solutions, we’ve helped countless homeowners in Liberty Twp and the Greater Cincinnati area navigate inspections successfully. Homeowners who document damage beforehand, gather supporting materials, and communicate clearly tend to see faster approvals and fuller coverage. This guide walks you through exactly what to do before the adjuster arrives.
Start your documentation immediately after discovering damage. The sooner you photograph and record details, the fresher your evidence and the more credible your claim appears.
Create a Roof Damage Documentation Checklist Before the Inspection
Documentation is your foundation. Before the adjuster arrives, you need a comprehensive record of the damage. The adjuster will look at your roof, but they need context: the timeline, extent of damage, and how it happened. Your documentation provides that framework.
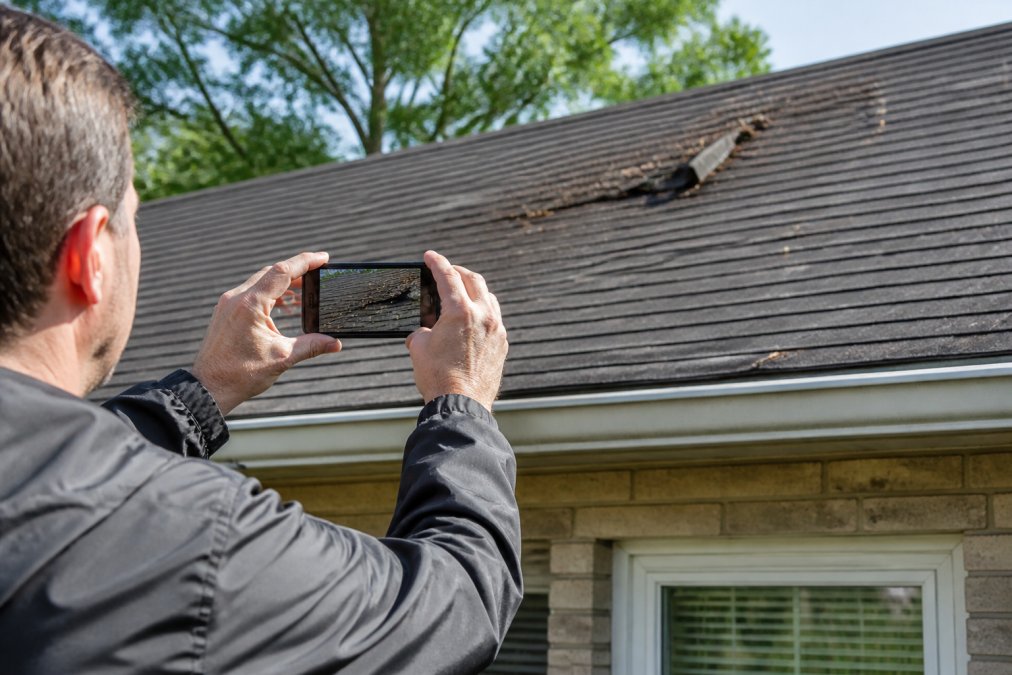
What to Photograph and Record
Take photos from multiple angles and distances, wide shots of the overall roof condition, then close-ups of specific damage. Include photos of debris in gutters, dents on siding, and any visible water stains on interior ceilings that correlate with roof damage.
Create a photo log with the date each photo was taken, location on the roof (north side, near chimney, etc.), and a brief description. This transforms random photos into organized evidence that adjusters appreciate.
Record the weather event that caused the damage: date, time, type of storm (hail, wind, heavy rain), and severity. If your area experienced a widespread weather event, mention that. Adjusters cross-reference local weather data, so your account should align with meteorological records.
Document your roof’s age if you know it. Check your home’s inspection report or maintenance records. Roof age affects depreciation calculations and coverage decisions.
Gathering Supporting Evidence
Collect any previous roofing estimates or inspection reports. These establish your roof’s pre-damage condition. Gather receipts from past roof repairs or maintenance to show responsible property upkeep.
Review your homeowner’s insurance policy and understand the coverage details, deductible, and any special endorsements. Read the section on weather-related damage carefully.
Locate any correspondence with your insurance company, including claim numbers and filing confirmations. Gather receipts for any temporary repairs you’ve made, such as tarping the roof. Insurance typically covers emergency mitigation costs.
The strongest documentation combines photos, written records, weather data, and supporting evidence. This combination tells a complete story about what happened, when it happened, and how much damage resulted.
What to Say to Insurance Adjuster for Roof Damage
Your communication during the inspection shapes how the adjuster interprets your claim. The right approach is confident, factual, and focused. You’re providing context and answering questions clearly, not trying to convince the adjuster that damage exists.
Key Points to Communicate Clearly
Start by explaining the event that caused the damage. Be specific about the date, time, and weather conditions. If you weren’t home during the event, say that. Honesty about what you directly observed builds trust.
Walk the adjuster through your documented damage using your photo log. Guide them from wide shots to close-ups, explaining what each photo shows and where on the roof it was taken. This narrative helps the adjuster understand the full scope rather than seeing isolated problem areas.
Point out damage beyond the roof itself. Hail or wind damage often extends to gutters, downspouts, siding, or vents. Show the adjuster any interior stains or water intrusion. This broader view establishes the severity of the weather event and justifies a comprehensive claim.
Mention any previous damage or repairs if relevant. Transparency here prevents complications later. Ask the adjuster questions about their process and what happens next. Engaged homeowners tend to receive better service and faster responses.
What Not to Say During the Inspection
Avoid speculation or exaggeration. Don’t claim damage you’re unsure about. Adjusters can tell when homeowners are stretching claims, which damages credibility and can lead to denial.
Don’t discuss money or coverage amounts. Stick to facts about the damage itself. Avoid admitting fault or apologizing for the property’s condition, as this can reduce your claim. Don’t mention other contractors or repair quotes you’ve obtained.
Never pressure the adjuster or express frustration. Stay professional and calm. If upset about a potential denial, address it through your insurance company’s appeals process after the inspection, not during it.
Exaggerating damage or misrepresenting the cause can result in claim denial or policy cancellation. Insurance companies investigate claims thoroughly. Dishonesty discovered later will cost you far more than any short-term gain.
Understanding Your Roof Inspection Report for Insurance
After the adjuster leaves, you’ll receive an inspection report outlining what damage was found, what’s covered, and the estimated repair or replacement cost. Understanding this document is critical because it forms the basis for your claim payout.
The report typically includes photos, a damage description, the adjuster’s coverage assessment, an estimated repair cost, and depreciation calculations if applicable. Read it carefully. If you disagree with any findings, you have the right to request clarification or appeal.
Look for specific damage descriptions detailing exactly what was found: number of damaged shingles, location, whether underlying structure is affected. If the report is vague, request a more detailed assessment.
Check the cost estimate against quotes from local roofers. If there’s a significant discrepancy, that’s worth investigating. Review the depreciation calculation if it applies. If your roof is relatively new or well-maintained, the depreciation should reflect that. Provide evidence of maintenance records or prior inspections if you disagree.
How Long Does a Roof Insurance Claim Take After Inspection
Most claims are resolved within 30 to 90 days, though timelines vary depending on complexity and whether disputes arise (naic.org).
After the inspection, the adjuster compiles their report and submits it to the claims department within 5 to 10 business days (iii.org). Once processed, the insurance company makes a coverage decision. If the damage is clearly covered and straightforward, approval can come within 2 to 3 weeks. Complex claims take longer.
After approval, the insurance company issues payment, typically sent to you and any contractors or lien holders listed on your policy. If you have a mortgage, your lender’s name appears on the check as a co-payee.
If you disagree with the decision or estimated payout, you can request a re-inspection or file an appeal, adding 15 to 30 days. Some policies include appraisal clauses allowing you to challenge the insurance company’s valuation through an independent appraiser.
Weather delays can extend timelines significantly if severe weather prevents safe roof access or delays repair completion.
Practical Steps to Prepare Your Property and Home
Securing Safe Access to Your Roof
Clear the area around your roof of debris, tools, or obstacles. Trim back tree branches that hang over the roof. These branches can obscure damage and may have contributed to it.
Ensure the adjuster can safely access your roof. If you have a ladder, place it where it’s stable and secure. Many adjusters can assess significant damage from the ground using binoculars or zoom cameras.
Mark damaged areas if they’re not immediately obvious. Small flags or tape marking damage clusters help draw attention to problem areas without being misleading.
Preparing Interior Areas and Documentation
Leave any interior water stains or damage visible. Don’t paint over them or attempt repairs before the inspection. The adjuster needs to see the full extent of damage.
Organize your documentation in a folder: policy, claim confirmation, photos with descriptions, weather data, previous inspection reports, and insurance company communication. Present this to the adjuster at the start of the inspection.
Prepare a list of questions or concerns. Clear your schedule for the inspection day and be present if possible. Your presence allows you to answer questions and gather information about next steps.
Day-of-Inspection: What to Expect and How to Help
Before the Adjuster Arrives
Do a final walkthrough to ensure areas the adjuster needs to access are clear and safe. Have your documentation ready and easily accessible. Dress appropriately for moving around your property.
Take notes during the inspection. Write down what the adjuster observes, photographs, and comments about coverage or next steps. Ask for the adjuster’s name, badge number, and contact information.

During the Inspection
Welcome the adjuster professionally. Briefly explain what happened and point out documented areas. Allow the adjuster to work without hovering or interrupting.
Point out damage that might not be immediately obvious, such as hail damage on vents or gutters. Ask clarifying questions about their findings to understand the assessment. Don’t debate their findings during the inspection; address disagreements through your insurance company’s appeals process afterward.
Request contact information and next steps before they leave. Ask when to expect the report, how you’ll be notified of the claim decision, and who to contact with questions.
Preparing for an insurance adjuster roof inspection transforms what might feel intimidating into a manageable, professional interaction. Homeowners who approach inspections with thorough documentation, clear communication, and organized evidence consistently report faster claim approvals and fair coverage.
When you’re ready to move forward with repairs after your claim is approved, DGK Home Solutions has over 20 years of experience handling insurance claims and managing roof replacements for homeowners throughout the Greater Cincinnati area. We guide you through the entire process, coordinate with your insurance company, and ensure the work meets both policy requirements and our high standards for quality. Contact us for a free quote and let us help you restore your roof with confidence.
Frequently Asked Questions
Q: Should I have a roofer present during the insurance adjuster roof inspection?
A: Having a qualified roofer present can be beneficial for your roof inspection. A professional roofer can help identify damage you might miss, explain technical issues to the adjuster, and ensure all damage is properly documented. This can be valuable if you're unfamiliar with roofing terminology or if your roof has complex damage patterns.
Q: What should I do if the insurance adjuster denies my roof damage claim?
A: If your claim is denied, request a detailed explanation in writing. Review the denial letter carefully and compare it against your documentation and photographs. You can file an appeal with your insurance company, providing additional evidence or a professional roofer's assessment. If the denial seems unfair, consider hiring an independent adjuster or consulting with a roofing contractor experienced in insurance claims to review the decision and next steps.
Q: How long does a roof insurance claim take after the inspection is complete?
A: Most roof insurance claims take 30 to 60 days from inspection to approval, though timelines vary by insurer and claim complexity. After the adjuster submits their report, your insurance company reviews it and issues a decision. Storm damage claims may move faster if there's widespread damage in your area. Contact your insurance agent regularly for updates, and ask for an estimated timeline specific to your claim.
Q: What do insurance adjusters look for on a roof during inspection?
A: Adjusters assess the extent and cause of damage, checking for missing or damaged shingles, leaks, structural issues, and signs of age or wear. They verify whether damage is covered under your policy and matches your claim description. They also evaluate the roof's overall condition to determine if the damage is recent or pre-existing. Documentation and photographs you provide help the adjuster understand the scope and support your claim.
This article was written using GrandRanker