Table of Contents
- What You’ll Need Before Starting
- Signs of Roof Flashing Failure
- Safety Precautions for Roof Work
- Step-by-Step Repair Process for Commercial Roof Flashing
- Commercial Roof Maintenance Checklist
- Common Mistakes to Avoid
- When to Call a Professional
- Conclusion
Last Updated: August 24, 2026
What You’ll Need Before Starting
Before tackling a commercial roof flashing repair, gather the right tools and materials. Having everything on hand prevents delays and keeps you working safely. A basic repair toolkit includes a caulking gun, utility knife, pry bar, hammer, and adjustable wrench. You’ll also need roofing nails, fasteners appropriate to your flashing type, and a wire brush for cleaning.
Sealant selection matters. The best sealant for commercial roof flashing depends on your climate, flashing material, and existing conditions. Silicone-based sealants work well in most climates and offer good UV resistance. Polyurethane sealants provide superior flexibility in areas with temperature extremes. Acrylic sealants are budget-friendly but require reapplication more frequently. Have a backup supply on hand, you’ll often need more than your initial estimate.
Safety equipment is non-negotiable. Wear a harness rated for your height and weight, along with slip-resistant boots. Gloves protect your hands from sharp metal edges and chemical exposure. Safety glasses shield your eyes from debris and sealant splatter. A hard hat protects against overhead hazards. For work in Liberty Twp and surrounding areas where weather can shift quickly, check conditions before starting any elevated work.
Keep a ladder stabilizer on hand, it prevents the ladder from slipping on wet or uneven surfaces. Many accidents happen during setup, not during the actual repair work.
Signs of Roof Flashing Failure
Roof flashing fails when water penetrates the seal, typically around roof penetrations like vents, skyllights, or chimneys. The most obvious sign is visible water staining on ceilings or walls below the flashing. Dark discoloration, mold, or mildew indicates water has been pooling for some time.
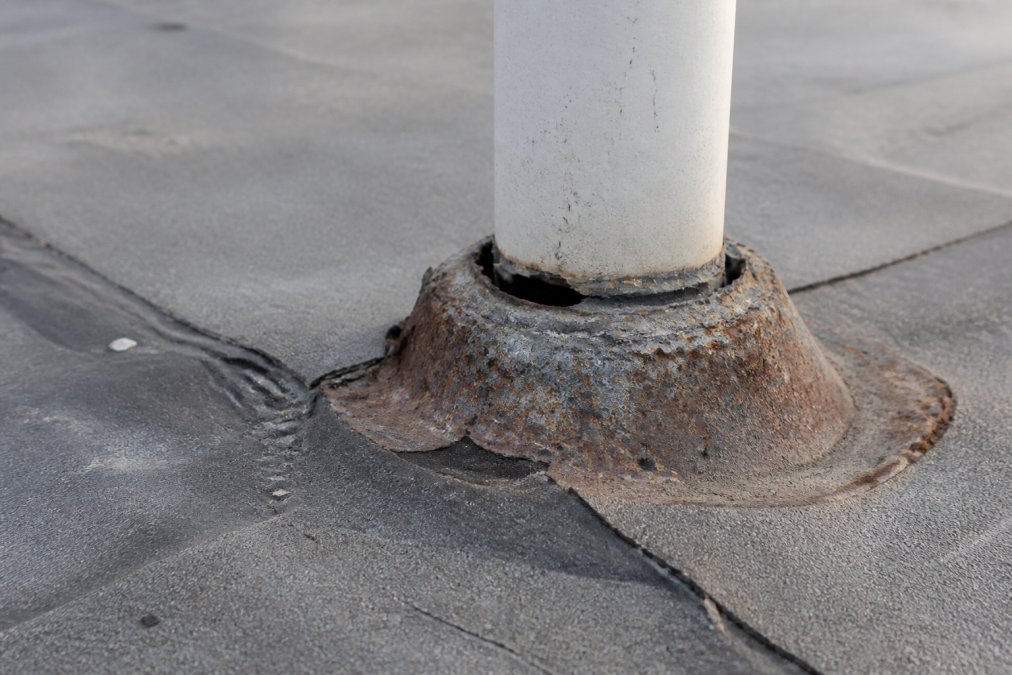
Inspect the flashing itself for rust, gaps, or lifted edges. Metal flashing may show orange or brown discoloration, early-stage corrosion that will worsen if left untreated. Sealant cracks, separation from the flashing base, or missing sections create direct pathways for water. In winter months, ice dams can force water under flashing that would normally shed water properly.
Listen for dripping sounds during or after rain. Moisture pooling in attic spaces indicates active leaks. Check for soft spots in roof decking near flashing, this signals structural damage from prolonged water exposure. Commercial properties in Liberty Twp often experience these issues after heavy storms when wind-driven rain finds any weakness.
Common failure points include the flashing-to-roof interface, fastener holes, and seams where sections overlap. Older flashing installed with tar-based sealants frequently fails because tar becomes brittle and loses adhesion over time. The transition from metal flashing to roof material is the most vulnerable spot.
Do not ignore minor flashing issues. A small leak becomes a major structural problem within one season. Water damage spreads quickly through insulation and framing, creating mold and compromising the building’s integrity.
Safety Precautions for Roof Work
Working at height requires serious precautions. Secure your harness to an anchor point rated for at least 5,000 pounds (osha.gov). Test all anchor points before trusting your weight to them. Never work alone on a commercial roof, have someone on the ground monitoring conditions and ready to call for help.
Check weather conditions before starting. Wind speeds above 25 mph make roof work dangerous (osha.gov). Wet conditions dramatically increase slip risk. Schedule work during stable weather windows. For commercial properties, notify tenants and building management of roof work in advance.
Use proper ladder placement. Position ladders at a 75-degree angle, roughly one foot out for every four feet of height (osha.gov). Three points of contact (two hands and one foot, or two feet and one hand) keep you stable. Never overreach from a ladder; reposition it instead.
Wear appropriate footwear with good traction. Roof surfaces become slippery when wet, dusty, or covered with algae. Steel-toed boots protect your feet if you drop tools. Gloves prevent cuts from sharp metal edges and improve grip when handling materials.
Respiratory protection matters when working with sealants. Many sealant products release fumes, particularly in warm weather. Use a respirator rated for the specific sealant you’re applying. Ensure adequate ventilation around the work area. If you experience dizziness, nausea, or headaches while working, stop immediately and move to fresh air.
Hydration is often overlooked but critical. Dehydration impairs judgment and increases accident risk. Drink water regularly, especially on hot days when you’re working under direct sun exposure.
Step-by-Step Repair Process for Commercial Roof Flashing
Successful flashing repair follows a logical sequence. Rushing through steps or skipping inspection creates recurring problems. A proper repair takes time but delivers lasting results.
Step 1: Inspect and Clean the Flashing Area
Begin by thoroughly examining the flashing and surrounding roof surface. Look for rust, corrosion, gaps, and existing sealant condition. Probe soft spots with a screwdriver, if it sinks more than a quarter inch, the roof decking needs replacement before you seal anything.
Clean the entire flashing area with a wire brush. Remove rust, loose paint, algae, and debris. A power washer works for some applications, but be cautious, high pressure can drive water under flashing or damage existing sealant. For delicate work, hand-brush the area. The surface must be completely dry before proceeding. Moisture trapped under new sealant causes adhesion failure.
Inspect fasteners holding the flashing in place. Corroded fasteners need replacement. Loose fasteners should be tightened. If fasteners are pulling through the flashing or roof material, they’re undersized and need upgrading to the next larger size.
Step 2: Remove Damaged Sealant and Fasteners
Use a utility knife to cut away all old sealant around the flashing perimeter. Scrape aggressively, old sealant bonds poorly to new material, creating a weak joint. A paint scraper or putty knife works well for this step. Remove every trace of the old sealant, including material in seams and under flashing edges.
Remove any fasteners that are corroded, loose, or pulling through the material. Replace them with stainless steel fasteners appropriate to your flashing type. Stainless steel resists corrosion far better than galvanized fasteners, particularly in areas with salt exposure or acid rain.
Inspect the flashing itself for damage. Small holes or cracks can be sealed, but extensive rust or deterioration means replacement is necessary. If more than 25 percent of the flashing surface shows corrosion, replacement is more cost-effective than repair.
Step 3: Repair or Replace the Flashing
For minor damage, apply a metal repair patch over holes or small cracks. Clean the area thoroughly, apply primer if the flashing is bare metal, then secure the patch with fasteners and sealant. Overlap the patch at least two inches on all sides of the damage.
For widespread corrosion or structural damage, remove the flashing completely and install new material. This typically involves removing fasteners, prying the old flashing free, and installing new flashing of the same type and size. Ensure new flashing is properly seated and aligned before fastening.
When reinstalling or replacing flashing around penetrations like vents or skylights, ensure the flashing sits flat against the roof surface. Gaps between flashing and roof create water entry points. Use shims or flashing boots designed for your specific penetration type.
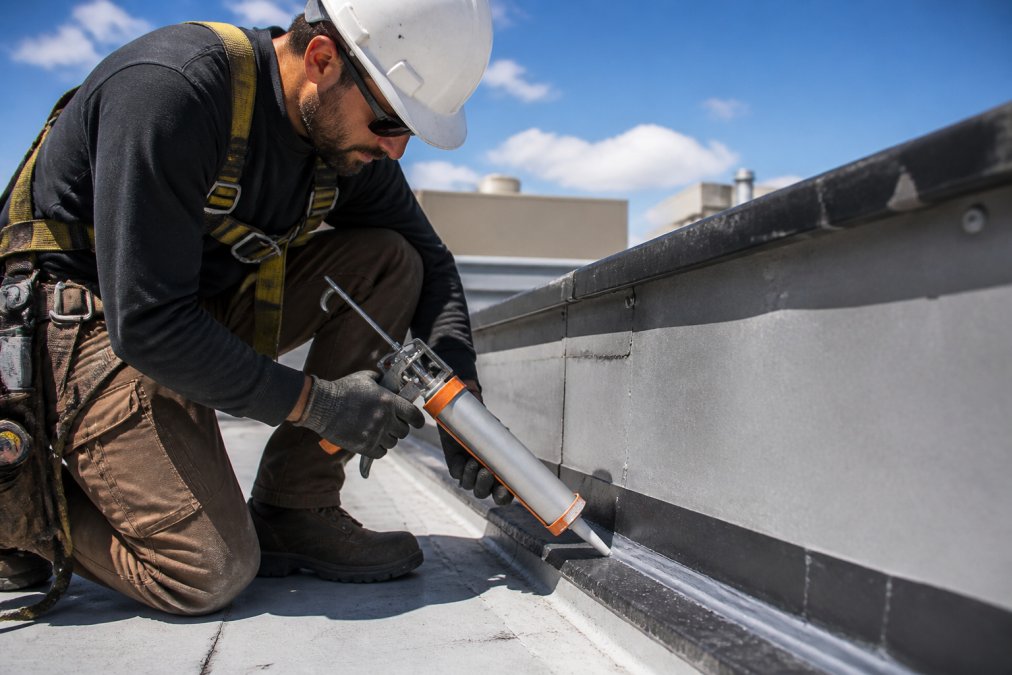
Step 4: Apply Best Sealant for Commercial Roof Flashing
The best sealant for commercial roof flashing provides flexibility, UV resistance, and strong adhesion. Silicone sealants are the industry standard for most applications. They remain flexible across temperature ranges, resist UV degradation, and adhere well to metal and concrete.
Load the sealant into a caulking gun. Apply a continuous bead along all edges where flashing meets the roof. The bead should be thick enough to fill gaps but not so thick that it sags. A quarter-inch bead is typical for most applications.
Smooth the sealant with a wet finger or caulk tool immediately after application. This creates a concave profile that sheds water effectively and improves adhesion. Work quickly before the sealant begins to set. Most silicone sealants cure fully within 24 hours, but initial set occurs within 30 minutes.
Apply sealant to all fastener heads, seams, and any gaps between flashing sections. Don’t leave fastener holes unsealed, water enters through these openings. Pay special attention to inside corners where flashing meets roof penetrations. These areas collect water and require extra sealant coverage.
Step 5: Reinstall Fasteners and Test
After sealant has cured (typically 24 hours), reinstall any fasteners you removed during repair. Use stainless steel fasteners rated for roofing applications. Space fasteners according to the flashing manufacturer’s specifications, typically 6 to 8 inches apart around the perimeter.
Drive fasteners until they’re snug but not over-tightened. Over-tightening pulls fasteners through thin flashing or cracks the sealant. Apply a small dab of sealant over each fastener head to prevent water entry.
Test the repair by running water over the flashing area with a hose. Watch for water flowing under the flashing or pooling near seams. Water should sheet off the surface cleanly. If water enters the flashing, identify the entry point and apply additional sealant.
For commercial properties in Liberty Twp, schedule testing after rain to observe actual performance. Natural rainfall tests the repair under real conditions. Check interior ceilings and walls for any signs of water intrusion within the first week.
Commercial Roof Maintenance Checklist
Preventive maintenance extends flashing life and prevents costly repairs. Establish a regular inspection schedule to catch problems early.
| Maintenance Task | Frequency | What to Look For |
|---|---|---|
| Visual flashing inspection | Twice yearly (spring/fall) | Rust, gaps, lifted edges, sealant cracks |
| Debris removal | After storms | Leaves, branches, dirt blocking drainage |
| Sealant condition check | Annually | Cracks, separation, brittleness |
| Fastener inspection | Annually | Corrosion, looseness, pulling through material |
| Interior water staining check | Quarterly | Discoloration on ceilings and walls below flashing |
| Gutter and drain cleaning | Before winter | Clogs that cause water backup into flashing |
| Professional inspection | Every 2-3 years | Structural integrity, underlying damage |
A commercial roof maintenance checklist keeps track of inspections and repairs. Document all work performed, including dates, materials used, and any issues discovered. This record proves maintenance history if warranty claims become necessary and helps identify recurring problems.
After severe weather, inspect flashing immediately. High winds, heavy rain, and temperature swings stress flashing connections. Early detection of damage prevents secondary problems like mold growth or structural rot.
Common Mistakes to Avoid
The biggest mistake is delaying repair. A small leak becomes a major problem quickly. Water spreads through insulation, rots framing, and creates mold. What costs a few hundred dollars to repair today costs thousands tomorrow.
Don’t use the wrong sealant. Tar-based products fail in sun exposure. Latex caulk isn’t flexible enough for metal flashing. Incompatible sealants don’t bond properly and separate within months. Verify the sealant is rated for roofing applications and compatible with your flashing material.
Avoid over-tightening fasteners. This pulls fasteners through thin flashing, cracks sealant, and creates new leak points. Snug is sufficient, you shouldn’t need a wrench to drive the fastener the final quarter turn.
Don’t skip surface preparation. Old sealant, rust, and dirt prevent new sealant from bonding. Rushing this step guarantees repair failure. Spend time cleaning thoroughly.
Many contractors apply sealant to wet surfaces. Water prevents adhesion and traps moisture that causes mold. Wait for complete dryness before sealing. In humid conditions, this may take longer than expected.
Ignoring underlying structural damage is common. If roof decking is soft or rotted, sealing the flashing won’t fix the problem. Address structural issues before applying new sealant.
Never apply sealant in freezing temperatures. Most sealants require temperatures above 40°F for proper cure. Cold weather application results in poor adhesion and premature failure.
When to Call a Professional
Some flashing repairs exceed DIY capability. Extensive rust affecting more than 25 percent of the flashing requires professional replacement. Structural damage to roof decking needs expert assessment and repair.
If you’re uncomfortable working at height, hire professionals. Roof work carries serious injury risk. Professional roofers have proper safety equipment, insurance, and experience managing fall hazards.
For commercial properties with multiple roof penetrations or complex flashing systems, professional inspection provides peace of mind. Commercial buildings often have warranty requirements specifying professional installation or repair.
If your initial repair doesn’t stop leaks, professional diagnosis is necessary. Persistent leaks often indicate problems beyond visible flashing issues, perhaps improper pitch, blocked drainage, or damage to roof decking.
DGK Home Solutions provides professional flashing repair and maintenance. Our team brings over 20 years of experience to every project, ensuring repairs are done right the first time. Contact DGK Home Solutions for a free assessment of your roof flashing condition and a detailed repair estimate.
Roof flashing repair protects your commercial building from water damage that compromises structure and creates liability. Proper repair involves careful inspection, thorough surface preparation, and quality sealant application. Small leaks demand immediate attention before they become expensive structural problems.
For commercial properties in Liberty Twp and the Greater Cincinnati area, DGK Home Solutions offers professional flashing repair and maintenance. Our team brings over 20 years of experience to every project, ensuring repairs are done right the first time. Contact DGK Home Solutions for a free assessment of your roof flashing condition and a detailed repair estimate.
Frequently Asked Questions
Q: What is the most common cause of commercial roof flashing failure?
A: Poor sealant deterioration and fastener corrosion are the leading causes of roof flashing failure. UV exposure, temperature cycling, and water infiltration degrade sealants over time, while rust develops on metal fasteners. Regular inspections catch these issues early before they cause leaks into the building structure.
Q: Can you repair commercial roof flashing without replacing the whole roof?
A: Yes. Minor damage, small gaps, failed sealant, or loose fasteners, can be repaired without full roof replacement. Clean the area, remove old sealant, apply new material, and reseal. However, if the flashing is severely rusted, bent beyond straightening, or if multiple sections are compromised, replacement is more cost-effective and durable than patching.
Q: What materials are best for repairing commercial roof flashing in this climate?
A: Use polyurethane or silicone sealants rated for freeze-thaw cycles, as they resist Ohio's temperature swings better than acrylic products. For flashing material itself, aluminum or galvanized steel withstand moisture and salt exposure. Always match the existing flashing material to ensure compatibility and consistent performance across the roof.
Q: How often should commercial roof flashing be inspected?
A: Inspect flashing twice yearly, spring and fall, plus after severe weather. Look for cracks, gaps, rust, or loose fasteners. A professional roof inspection as part of a commercial roof maintenance checklist should occur annually to catch deterioration early and plan repairs before leaks develop.
This article was written using GrandRanker