Table of Contents
- Why Winter Roof Preparation Matters in Ohio
- Professional Roof Inspection: Your First Winter Defense
- Ohio Roof Winterization Checklist: Step-by-Step Preparation
- Ice Dam Prevention Ohio: Protecting Against Winter’s Biggest Threat
- Attic Insulation Ohio Winter: Managing Moisture and Thermal Bridging
- Addressing Sealant, Flashing, and Fastener Issues Before Winter
- Soft Washing and Seasonal Roof Cleaning for Winter Readiness
- Common Winter Roof Mistakes to Avoid in Ohio
Last Updated: July 22, 2026
Winter in Ohio brings beautiful snow-covered landscapes, but it also creates serious challenges for your roof. How to prepare your roof for winter in Ohio requires a proactive approach that addresses the state’s unique climate conditions, freeze-thaw cycles, heavy snow loads, and ice dams that can cause thousands of dollars in damage if left unchecked. At DGK Home Solutions, we’ve spent over 20 years helping homeowners in Liberty Twp and across the Greater Cincinnati area protect their roofs from winter’s harshest demands. Most winter roof problems are preventable with the right preparation done before temperatures drop.
Why Winter Roof Preparation Matters in Ohio
Ohio’s winter weather creates freeze-thaw cycles, where snow melts during the day and refreezes at night. This constant expansion and contraction stresses roofing materials, weakens sealants, and accelerates deterioration of shingles and flashing.
Ice dams are the most dangerous winter threat. They form when warm air from your attic melts snow on the roof, the water runs down to the cold eaves, and then refreezes into a solid dam. This dam traps water behind it, forcing meltwater up under your shingles and into your attic, causing leaks, mold, and structural damage that often costs more to repair than the original roof installation.
Heavy snow loads compound the problem. A typical winter storm can deposit 8-12 inches of snow on your roof. Wet, heavy snow can weigh 10-20 pounds per square foot. If your roof’s structural integrity is compromised by missing shingles, deteriorated underlayment, or poor ventilation, that weight becomes dangerous.
Check your attic after a heavy snowfall. If you see daylight around the edges of your roof or notice water stains on the attic ceiling, your roof is already failing. These are emergency signals, not minor issues.
The best time to address winter roof problems is September through November, before cold weather hits.
Professional Roof Inspection: Your First Winter Defense
A professional roof inspection is your foundation for winter readiness. This detailed assessment examines every component that affects winter performance.
What inspectors check for winter readiness
A thorough winter roof inspection examines shingle condition and adhesion, flashing integrity, underlayment condition, gutters and downspouts, soffit and ridge vents, fasteners and sealant, and structural signs of damage.
Shingle condition and adhesion. Winter winds and temperature fluctuations stress shingles. Inspectors look for curling, cracking, blistering, or missing shingles, and check shingle adhesion, the seal that keeps shingles bonded to the roof deck. Poor adhesion means wind-driven rain and snow can work their way under shingles.
Flashing integrity. Flashing is the metal trim that seals gaps where your roof meets chimneys, vents, skylights, and walls. Damaged or improperly sealed flashing is the #1 source of winter leaks.
Underlayment condition. The underlayment is the barrier between your shingles and the roof deck. In winter, it’s your last line of defense against water that gets under shingles. Inspectors check for tears, deterioration, or improper installation.
Gutters and downspouts. Clogged gutters prevent water from draining, causing it to back up under shingles and contribute to ice dam formation. Downspouts should extend at least 4-6 feet away from your foundation.
Soffit and ridge vents. These vents control airflow through your attic. Blocked or insufficient vents prevent proper air circulation, which leads to moisture buildup and ice dam formation.
Fasteners and sealant. Roofing nails and screws can loosen over time. Deteriorated sealant around vents and penetrations allows water infiltration. Both issues worsen in winter when temperatures contract materials.
Structural signs of damage. Sagging roof lines, soft spots on the roof deck, or visible rot indicate structural problems that must be addressed before winter.
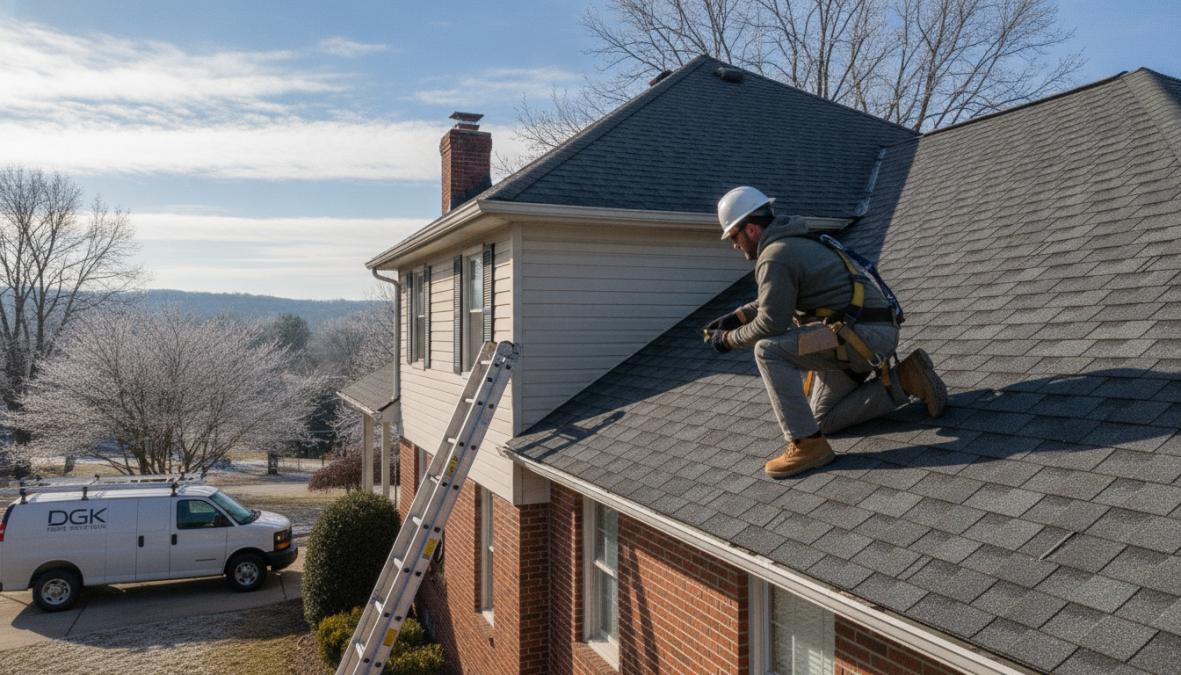
Identifying missing or damaged shingles before cold weather
Look for curled or cupped shingles, visible cracks, bald spots where granules are missing, lifted shingles that aren’t lying flat, and discolored or stained areas. In Liberty Twp and surrounding areas, asphalt shingles typically last 15-20 years. If your roof is older than 15 years and you see any of these signs, plan for replacement before winter.
Do NOT attempt to walk on your roof in fall or winter to inspect it yourself. Wet leaves, frost, and ice make the roof extremely slippery. A fall from a roof is life-threatening. Always hire a licensed roofing contractor for inspections.
Ohio Roof Winterization Checklist: Step-by-Step Preparation
Once your inspection is complete and any necessary repairs are made, follow this step-by-step winterization checklist. These tasks should be completed by mid-November, before the first heavy snow.
Cleaning gutters and downspouts
Clogged gutters are the enemy of winter roof protection. Remove all leaves and debris from your gutters using a ladder, gutter scoop, or small shovel. Flush gutters with a garden hose, starting at the high end and working toward the downspout. Water should flow freely through downspouts, which should direct water at least 4-6 feet away from your foundation. Check that gutter hangers are tight and not pulling away from the fascia.
Gutter cleaning is the single most impactful winterization task you can do. Clean gutters prevent ice dam formation better than any other single action.
Removing leaves, pine needles, and debris
Use a roof rake or leaf blower from the ground (do NOT go on the roof) to remove debris from the roof. Clear leaves or debris around your roof vents and chimney. Trim branches that hang over your roof back 6-8 feet from the roof edge. In Ohio’s humid climate, moss and algae can grow on shaded roof areas. While not immediately dangerous, they trap moisture and accelerate shingle deterioration.
Checking flashing and sealant integrity
Inspect chimney flashing for gaps, cracks, or separation between the flashing and chimney. Check vent flashing around plumbing vents, exhaust vents, and roof penetrations. Examine valley flashing where two roof slopes meet. Assess sealant condition around all flashing, it should be flexible and intact. Look for rust or corrosion on metal flashing; surface rust is cosmetic, but deep rust that creates holes must be addressed.
If you notice any of these issues during your inspection, contact a roofing contractor before winter. Flashing repairs are relatively inexpensive ($200-500 per area) compared to the cost of water damage inside your home ($3,000-10,000+).
Ice Dam Prevention Ohio: Protecting Against Winter’s Biggest Threat
Ice dams are the most destructive winter roof problem in Ohio. Understanding how they form and how to prevent them is essential for protecting your home.
Understanding how ice dams form in Ohio’s freeze-thaw cycles
Warm air from your attic rises through the roof and melts snow on the upper portions of your roof. The melted water runs down the roof toward the eaves. At the eaves, the roof overhangs beyond the heated interior of your home, so it’s much colder. The water refreezes into a solid dam of ice. Water above the dam continues to melt and run downward, but it can’t flow off the roof. Trapped water backs up under the shingles and into your attic, where it leaks through the roof deck and into walls, ceilings, and insulation.
Ohio’s winter weather pattern creates ideal ice dam conditions. Temperatures fluctuate around freezing, it might be 35°F during the day and 25°F at night. This constant cycling of melting and refreezing is worse than steady cold weather.
Ice dams often cause damage that doesn’t appear until spring or summer. Water seeping into your attic may not show obvious signs immediately. By the time you notice stains on your ceiling, significant mold growth may already be occurring inside walls. This is why prevention is critical.
Ventilation and insulation strategies to prevent ice buildup
The root cause of ice dams is warm air from your attic melting snow on the roof. Preventing this warm air from reaching the roof is the most effective dam prevention strategy.
Adequate attic insulation is the foundation of ice dam prevention. Your attic should be insulated to an R-value of at least R-38 to R-60, depending on your location and heating costs. Better insulation keeps heated air inside your living space instead of letting it escape into the attic. Less warm air in the attic means less snow melts on the roof.
Proper attic ventilation is equally important. Your attic needs continuous airflow from soffit vents (at the eaves) to ridge vents (at the peak). This airflow removes any warm, moist air that does escape from your living space. Soffit vents should have 1 square foot of free vent area for every 150 square feet of attic space. Ridge vents should have equivalent area. Both must be unobstructed.
Look in your attic on a cold day. You should feel cold air moving from the soffit vents toward the ridge. If the attic feels warm or stagnant, ventilation is inadequate.
Attic Insulation Ohio Winter: Managing Moisture and Thermal Bridging
Your attic’s insulation and ventilation system is the engine that prevents ice dams and winter roof damage.
Evaluating R-value and condensation risk
R-value measures insulation’s resistance to heat flow. Ohio’s climate demands R-38 minimum for attics in most of Ohio, R-49 recommended for maximum energy efficiency and ice dam prevention, and R-60 ideal for homes in areas with harsh winters or high heating costs.
To check your current R-value, measure the depth of insulation in your attic. Fiberglass batts are typically R-3.2 per inch, so 12 inches equals R-38.
Condensation risk is the hidden danger in attics. When warm, moist air from your living space reaches the cold attic, the moisture condenses into water. This water soaks into insulation, reducing its effectiveness. Over time, condensation causes mold growth on insulation and roof framing, deterioration of wood framing, and structural damage that can cost $10,000+ to repair.
The solution is dual: improve insulation to reduce the temperature difference, and improve ventilation to remove moist air before it condenses.
Soffit and ridge vents: ensuring proper airflow
Soffit vents and ridge vents work together to create continuous airflow through your attic. This airflow removes moisture and keeps the roof surface cold.
Soffit vents are small vents in the soffits (the underside of the roof overhang at the eaves). They allow cold outside air into the attic. Soffit vents should be unobstructed by insulation or debris, sized adequately (1 square foot per 150 square feet of attic space), and distributed evenly around the entire perimeter of the house. Many homes have soffit vents that are blocked by insulation that’s been pushed too close to the eaves. Ensure insulation is pulled back 1-2 feet from the soffit vents.
Ridge vents are vents that run along the peak of your roof. They allow warm, moist air to escape from the attic. Ridge vents should be installed along the entire length of the roof peak, have equivalent area to soffit vents, and not be blocked by debris or roofing material.
| Ventilation Issue | Sign | Solution |
|---|---|---|
| Blocked soffit vents | Insulation touching soffit, no airflow | Pull insulation back 1-2 feet from eaves |
| Missing ridge vents | No vents along roof peak | Install ridge vents along entire peak |
| Inadequate vent area | Warm, stagnant attic in winter | Add soffit or ridge vents to increase area |
| Debris blocking vents | Leaves or debris in vent openings | Clear vents and install vent covers if needed |
Addressing Sealant, Flashing, and Fastener Issues Before Winter
Sealant, flashing, and fasteners are the details that prevent water infiltration. In winter, they’re the difference between a dry attic and a flooded one.
Sealant degradation is inevitable. Over time, caulk and sealant harden, crack, and fail. Inspect all sealant around chimneys, vent pipes, skylights, wall-to-roof transitions, and any roof penetration. Cracked or missing sealant should be replaced with roofing-grade silicone caulk.
Fastener issues are common in older roofs. Roofing nails and screws can loosen as the roof expands and contracts. Look for nails that have backed out and are poking through shingles, loose or missing screws at vent flashing, and fasteners that are rusted or corroded. Tighten or replace loose fasteners.
Flashing replacement may be necessary if flashing is rusted, dented, or improperly installed. Professional flashing installation costs $200-500 per area but prevents thousands in water damage.
Soft Washing and Seasonal Roof Cleaning for Winter Readiness
Soft washing is a gentle cleaning method that removes algae, moss, and debris without damaging shingles. Algae and moss trap moisture, which accelerates shingle deterioration and contributes to ice dam formation. Soft washing removes them by applying a biodegradable cleaning solution to the roof, letting it sit for 15-20 minutes to break down algae and moss, and gently rinsing with low-pressure water (below 200 PSI).
Professional soft washing costs $300-800 depending on roof size and condition. Schedule it for October or early November, after leaves have fallen but before winter weather arrives. Never attempt DIY roof cleaning; working on a roof is dangerous, and improper cleaning can damage shingles or force water into your attic.
If you see green or black staining on your roof, it’s likely algae or moss. These organisms trap moisture and accelerate shingle deterioration. Soft washing removes them and extends your roof’s life.
Common Winter Roof Mistakes to Avoid in Ohio
Mistake 1: Ignoring gutter cleaning. Clogged gutters are the #1 cause of ice dams and winter leaks. Clean gutters every fall, without exception.
Mistake 2: Walking on the roof in winter. A slippery roof is a dangerous roof. Never walk on a roof covered with snow, ice, or frost. Always hire professionals for winter roof work.
Mistake 3: Waiting until winter to address roof problems. Once snow arrives, many repairs become impossible. Address problems in fall when weather is mild.
Mistake 4: Blocking soffit vents with insulation. When adding attic insulation, keep it 1-2 feet back from soffit vents to preserve ventilation.
Mistake 5: Using pressure washers on the roof. High-pressure water forces its way under shingles and into your attic. Soft washing is the only safe cleaning method.
Mistake 6: Ignoring small leaks. A small leak in fall becomes a major problem by spring. Address all leaks immediately.
Mistake 7: Not checking attic ventilation. If you don’t know whether your attic has proper ventilation, you’re at risk. Check your attic this fall.
Mistake 8: Assuming your roof is fine because it "looks good" from the ground. Professional inspections catch problems before they become expensive.
Mistake 9: Delaying gutter repair. Sagging gutters and loose hangers get worse over time. Repair or replace damaged gutters before winter.
Mistake 10: Not maintaining roof ventilation. Check vents regularly and ensure they’re open and unobstructed.
How to prepare your roof for winter in Ohio isn’t just about following a checklist, it’s about understanding why each step matters and committing to preventative action before cold weather arrives. The investment you make in fall preparation prevents far more expensive damage in winter and spring.
If you’ve identified any issues during your inspection or winterization, don’t wait. Contact DGK Home Solutions for a professional roof assessment. With over 20 years of experience serving Liberty Twp and the Greater Cincinnati area, our team provides honest evaluations, clear communication about what’s needed, and stress-free installation of repairs or replacements. We handle everything from minor flashing repairs to complete roof replacements, and we work directly with insurance companies on storm damage claims. Get a free quote today and ensure your roof is protected for winter.
Frequently Asked Questions
What should I do to my roof before winter in Ohio?
Start with a professional roof inspection to check for damaged shingles, flashing issues, and sealant problems. Clean gutters and downspouts thoroughly to prevent water backup. Remove leaves and pine needles from the roof surface. Evaluate your attic insulation and ventilation to prevent ice dams. Check that all fasteners are secure and sealant is intact. These steps prepare your roof for winter weather and Ohio's freeze-thaw cycles, protecting your structural integrity and preventing costly water damage.
How do I prevent ice dams on my roof in Ohio?
Ice dams form when heat escapes through the roof, melting snow that refreezes at the eaves. Prevent them by improving attic insulation to maintain consistent roof temperature, ensuring soffit and ridge vents are clear and functional for proper airflow, and keeping gutters clean so water drains freely. Seal air leaks around penetrations and maintain adequate ventilation. In severe cases, consider heat cables or professional soft washing to remove debris that traps moisture. Proper attic ventilation and insulation are your strongest defenses against ice dam formation in Ohio's climate.
When should I get a professional roof inspection for winter in Ohio?
Schedule your professional roof inspection in early fall, September or October, before heavy rain and snow arrive. This timing allows contractors to identify and repair issues before winter weather stresses your roof. An inspection should evaluate shingle adhesion, flashing integrity, sealant condition, gutters, downspouts, attic ventilation, and insulation. If you've experienced recent hail damage or seasonal wear, inspect sooner. Early inspection prevents emergency winter repairs and gives you time to address any issues discovered before cold weather arrives.
What R-value insulation is recommended for attics in Ohio winter conditions?
Ohio's climate typically requires R-38 to R-60 attic insulation depending on your specific location and home age. Proper insulation reduces thermal bridging and prevents condensation buildup that can lead to moisture damage and ice dams. Pair insulation with adequate soffit and ridge vents to ensure airflow without heat loss. Have a professional evaluate your current insulation level during a winter preparation inspection. Upgrading insulation is one of the most effective ways to prevent ice dams and reduce heating costs while protecting your roof's structural integrity.
This article was written using GrandRanker