Table of Contents
- Why a Detailed Commercial Roof Inspection Report Matters
- Commercial Roof Inspection Frequency Requirements You Should Know
- Step 1: Gather Your Tools and the Right Commercial Roof Inspection Checklist
- Step 2: How to Document Commercial Roof Damage on Site
- Step 3: Build Your Commercial Roof Inspection Report Template
- Common Mistakes to Avoid in Your Report
- Conclusion: Turn Findings into Action
- Frequently Asked Questions
Last Updated: September 9, 2026
A commercial roof inspection report is the formal document that records the condition of a roof membrane, flashing, drainage, and structural details at the time of a site visit. Whether you are a property manager preparing for an insurance claim or a contractor documenting pre-existing damage, learning how to prepare commercial roof inspection report documentation properly can mean the difference between a fast claim approval and a lengthy dispute. This guide from DGK Home Solutions, which has served commercial property owners across Liberty Twp, OH and the Greater Cincinnati area for over 20 years, walks you through the process from tool selection to final report delivery.
The core principle is simple: if it isn’t written down and photographed, it didn’t happen. A thorough inspection report protects both the building owner and the contractor by creating a timestamped, objective record of conditions. Below, we’ll show you exactly how to structure your documentation so that adjusters, lenders, and maintenance teams can act on it without calling you for clarification.
Why a Detailed Commercial Roof Inspection Report Matters
A well-prepared roof inspection report serves as legal protection, a maintenance roadmap, and a financial document all in one. When storm damage occurs, insurance adjusters base their coverage decisions almost entirely on the written and photographic evidence you provide. A vague report leads to denied claims or partial payouts.
Beyond insurance, these reports catch small problems before they become emergencies. A report that notes a 2-inch pond of standing water near a drain is far more valuable than a verbal warning, because it gives facility managers a documented reason to budget for corrective work. Commercial property owners who maintain a consistent history of inspection reports may negotiate better rates on building coverage, since underwriters often view documented maintenance as reduced risk.
Commercial Roof Inspection Frequency Requirements You Should Know
Industry guidance generally recommends inspecting commercial roofs twice per year, once in the spring and once in the fall, plus after any major storm event. The fall inspection is critical in the Liberty Twp and Ohio region because it identifies damage before winter freeze-thaw cycles widen cracks and compromise the membrane.
While there is no single federal mandate that dictates inspection frequency for all commercial buildings, your warranty agreement and insurance policy likely set expectations. Most membrane manufacturers require documented inspections to keep warranties valid, and many policies reference the National Roofing Contractors Association guidelines as the standard of care for maintenance schedules. Facility managers should also review the OSHA requirements for walking and working surfaces before any inspector steps onto the roof, since fall protection rules apply to every inspection visit.
A practical rhythm to follow is the “2+1” rule: two scheduled inspections per calendar year plus one unscheduled inspection within 48 hours of any hail, high-wind, or heavy-rain event.
Step 1: Gather Your Tools and the Right Commercial Roof Inspection Checklist
Before you set foot on the roof, assemble a kit that allows for thorough documentation. A commercial roof inspection checklist is only useful if you have the tools to verify what you see.
Your baseline kit should include a moisture meter, a tape measure, a chalk line, a digital camera or smartphone with a high-resolution lens, and a clipboard with your checklist printed on weatherproof paper. You also need a copy of the original roof specification or as-built drawings, since you cannot assess membrane age or warranty coverage without them. For low-slope roofs, bring a squeegee to clear standing water so you can inspect the membrane surface beneath it.
The checklist itself should be organized by zone rather than by material type. Divide the roof into quadrants or sections based on drain locations. This approach ensures that a 50,000-square-foot roof gets the same scrutiny in section four as it did in section one.
Step 2: How to Document Commercial Roof Damage on Site
Documentation on site follows a strict sequence: capture the overall context first, then zoom into the specific defect. Start each section of the roof with a wide-angle photo showing the entire quadrant. Then take close-up shots of each anomaly, placing a tape measure or a common object like a coin next to the damage to establish scale.
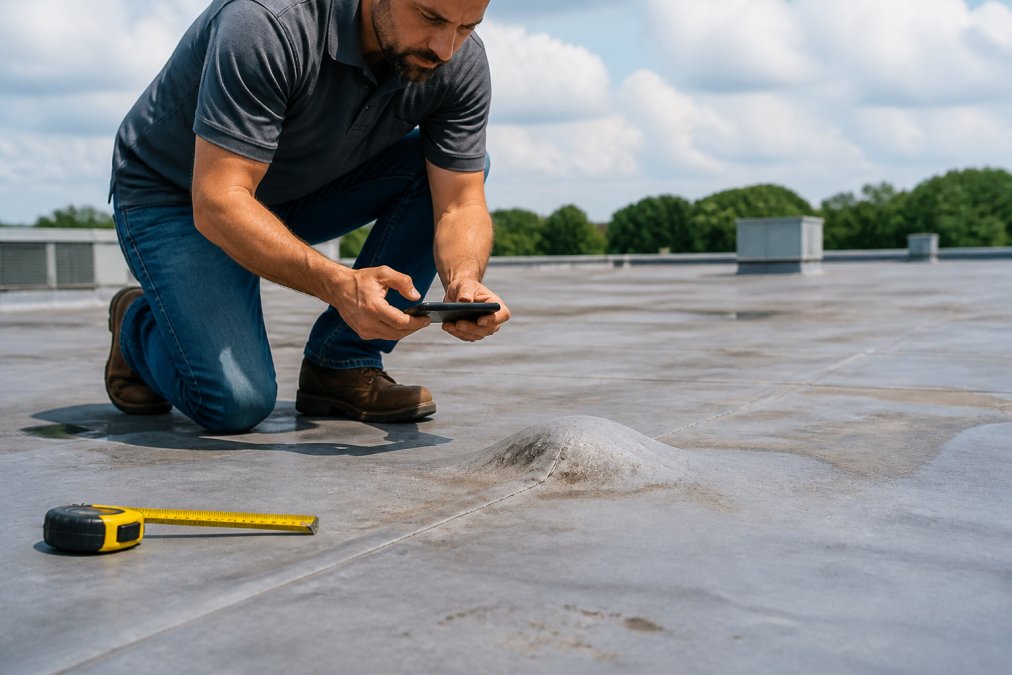
When you find a defect, record five data points for each one: location on the roof grid, type of damage, approximate dimensions, suspected cause, and whether water intrusion is active or historical. For blisters, note whether they are open or closed. For cracks, measure both length and width. This level of detail is what separates a professional roof inspection report from a casual walk-around.
A common mistake is photographing only the damage and not the surrounding context. Adjusters need to see that the crack sits 3 feet from a parapet wall or that the ponding water collects around a specific drain. GPS coordinates on your phone are a useful addition, but a hand-drawn sketch of the roof with numbered damage markers remains the most effective way to communicate location.
Step 3: Build Your Commercial Roof Inspection Report Template
A commercial roof inspection report template should follow a standardized structure that an adjuster or facilities director can scan in under two minutes. Organize the report into these sections: executive summary, site and system information, inspection findings, photographic evidence, and recommendations.
The executive summary is the most important section. It must state, in three sentences or less, the overall condition of the roof, the critical issues found, and the recommended action. A busy property owner should be able to read only this page and understand their situation. The findings section should use a severity rating system, such as “Critical,” “Needs Attention,” and “Monitor,” so that maintenance crews know where to focus first.
Here is a practical structure for the findings table:
| Severity | Issue Type | Location | Recommended Action | Priority Timeline |
|---|---|---|---|---|
| Critical | Open blister with exposed membrane | Quadrant B, near drain 3 | Emergency patch and moisture survey | Within 7 days |
| Needs Attention | Ponding water, 1.5 inches deep | Quadrant D, north slope | Improve drainage, add crickets | Within 30 days |
| Monitor | Hairline crack in flashing sealant | Parapet wall, east side | Re-caulk and observe | Next scheduled visit |
Every report should close with a recommendation section that distinguishes between repairs needed to maintain warranty coverage and upgrades that would extend the roof’s service life. The guidance published by the U.S. General Services Administration on roof maintenance emphasizes that separating these categories helps building owners allocate capital budgets more effectively.
Common Mistakes to Avoid in Your Report
The most frequent error in commercial roof inspection reports is failing to date-stamp photographs or losing the correlation between photos and written notes. If you write “crack at the east parapet” but your photo log shows a different location, the entire report loses credibility. Always number your photos and reference those numbers directly in the findings section.
Another mistake is documenting only visible interior leaks while ignoring the roof surface. Interior water stains tell you where water is exiting, not where it is entering. Water can travel horizontally along a deck for dozens of feet before it drips through a ceiling. A report that identifies interior damage without a corresponding roof defect is incomplete.
Inspectors also tend to overlook the “soffit and fascia” condition on commercial buildings with parapet walls. Cracks in the coping or loose counter-flashing allow water behind the membrane, and these issues appear in reports far less often than they occur in the field. When in doubt, photograph the edge details and let the report reader decide their relevance.
Conclusion: Turn Findings into Action
The value of a commercial roof inspection report is realized only when the findings lead to action. A report that sits in a filing cabinet is merely an expense; a report that triggers a timely repair protects the building asset and preserves warranty coverage. For property owners in Liberty Twp, OH, scheduling inspections before the seasonal transitions in spring and fall gives you a documented baseline that supports both maintenance planning and insurance claims.
Preparing these reports consistently becomes easier with each iteration. Start with a solid template, photograph everything, and rate every finding by severity. When you need a partner to perform the inspection or execute the recommended repairs, DGK Home Solutions offers honest assessments backed by over 20 years of experience in commercial roofing, siding, and gutters across the Greater Cincinnati area. Our team handles projects of any size and provides prompt, clear communication from assessment through completion.
Frequently Asked Questions
What should be included in a commercial roof inspection report?
A complete report should list the roof system type, its age, and the inspection date. It must document all observed conditions, including damage like punctures, ponding water, or failed flashings. Include photos with location notes and a clear summary of required repairs. Prioritize issues by severity so the property owner knows which problems are urgent and which are routine maintenance.
How often should commercial roofs be inspected in Ohio?
Industry standards and most roofing manufacturers recommend a commercial roof inspection at least twice per year, typically in the spring and fall. You should also schedule an inspection after any major storm with high winds or hail, since damage may not be visible from the ground. Regular checks help you catch small issues before they become costly leaks.
How do you document roof defects for insurance claims?
Take clear, dated photos of each defect from multiple angles, and include a wide shot showing its location on the roof. Record the size of the damage using a tape measure or a common object for scale. Describe the cause, such as wind uplift or hail impact, and note any water intrusion inside the building. This documentation strengthens your roof inspection report and speeds up the claims process.
Is there a standard template for commercial roof inspection reports?
There is no single required form, but most professional reports follow the same structure. A good template includes a header with building and roof details, a checklist of inspected areas, a section for documented findings with photos, and a prioritized repair list. Using a consistent template ensures you do not miss critical areas and makes reports easier for property owners and adjusters to review.
Get a free quote from DGK Home Solutions and turn your next roof inspection report into a clear maintenance plan.