Table of Contents
- What Causes Gutters to Sag
- What You’ll Need Before Starting
- How to Fix Sagging Gutters: Step-by-Step
- How to Re-Pitch Gutters for Proper Drainage
- Best Tools for Gutter Repair
- Understanding Gutter Hanger Replacement Cost
- Common Mistakes to Avoid
- When to Call a Professional
Last Updated: August 21, 2026
Sagging gutters signal that water isn’t draining properly. When gutters sag, water pools against your fascia board, seeps into your soffit, and eventually enters your home. The good news: you don’t always need full replacement. At DGK Home Solutions, we’ve helped homeowners in the Greater Cincinnati area restore proper drainage and prevent costly water damage by addressing the root cause: failing hangers and improper pitch.
This guide walks you through how to fix sagging gutters step-by-step, from inspection to repair.
What Causes Gutters to Sag
Failing hangers are the most common culprit. Gutter hangers (brackets or straps) hold gutters to the fascia board. Over time, they loosen, bend, or corrode from seasonal expansion, wind vibration, or the weight of water, leaves, and debris. When hangers fail, gutters sag in the middle or at the ends.
Improper hanger spacing is another frequent cause. Gutters should have hangers spaced 24 to 32 inches apart (nachi.org). Wider spacing causes the gutter section between them to sag under its own weight and water load.
Debris buildup accelerates sagging. Leaves, twigs, and sediment add significant weight, a clogged gutter can weigh hundreds of pounds, pulling it away from the fascia and creating visible sag.
Water pooling is both symptom and cause. As a gutter sags, water pools in the low spot instead of flowing toward the downspout. Standing water adds weight, increasing sag in a vicious cycle.
Finally, improper pitch prevents drainage. Gutters need a slight downward slope toward the downspout, about 1/4 inch drop for every 10 feet of gutter run (nachi.org). Without proper pitch, water pools and the gutter sags under the weight.
What You’ll Need Before Starting
Gather the right tools and safety equipment before climbing up to inspect and repair your gutters.
Safety Equipment:
- Sturdy extension ladder
- Work gloves (leather or heavy-duty nitrile)
- Safety glasses
- Non-slip footwear
- Fall protection (harness or rope for steep roofs)
Inspection and Cleaning Tools:
- Gutter scoop or stiff brush
- Bucket or bag for debris
- Garden hose with spray nozzle
- Flashlight or headlamp
Repair Tools:
- Adjustable wrench or socket set
- Screwdriver set (Phillips and flat-head)
- Drill with bits
- Torpedo level or laser level
- Measuring tape
- Pencil or marker
Materials:
- Replacement gutter hangers (same type and size as existing)
- Galvanized or stainless steel fasteners
- Caulk or sealant (if needed for small gaps)
- Shims (thin wooden wedges for leveling)
A helper makes the job easier, especially for holding the gutter level while you tighten fasteners.
How to Fix Sagging Gutters: Step-by-Step
Fixing sagging gutters is methodical work well within reach for a homeowner with basic tools and patience.
Step 1: Inspect and Clean Your Gutters
Set up your ladder on stable, level ground. Climb up and visually inspect the entire gutter length. Look for visible sags, rust or corrosion on hangers, bent or missing brackets, and areas where the gutter has pulled away from the fascia.
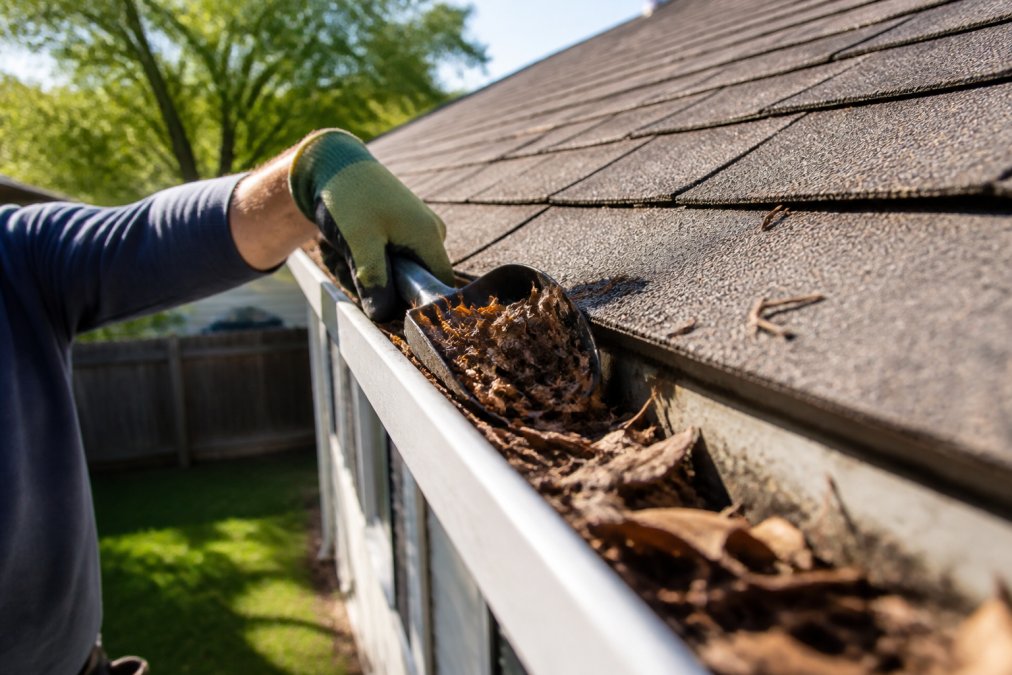
Remove all debris using a gutter scoop or stiff brush. Work from one end toward the downspout, pushing debris into a bucket. After removing bulk debris, flush the gutter with a garden hose. Start at the end opposite the downspout and spray water along the entire length. This clears fine sediment, reveals the true pitch, and shows where water pools. If water pools in the middle or flows backward, you have a pitch problem.
Pay special attention to the downspout opening. Make sure it’s clear and water flows freely through it. A clogged downspout can back water up into the gutter, creating the illusion of a pitch problem.
Step 2: Assess Hanger Condition and Spacing
Now that the gutter is clean, inspect each hanger. Look for rust, corrosion, bent metal, cracked or missing fasteners, or hangers that have pulled loose from the fascia.
Measure the distance between hangers using a measuring tape. Standard spacing is 24 to 32 inches. Hangers spaced 48 inches apart or more likely contribute to sag. Missing or severely corroded hangers are definite problems.
Check for loose fasteners by gently pushing up on the gutter near each hanger. If it moves or flexes excessively, fasteners are loose. Try tightening them with a wrench or screwdriver. If they won’t tighten or the hanger is bent, it needs replacing.
Inspect the fascia board. If it’s soft, rotted, or crumbling, fasteners won’t hold properly. Rotted fascia needs repair before reinstalling hangers.
Step 3: Tighten Existing Hangers
Start with loose but undamaged hangers. Use an adjustable wrench or correct socket to tighten each fastener, turning clockwise with firm, steady pressure. Don’t over-tighten, you want the hanger snug against the fascia, not stripped or bent.
Work your way along the entire gutter. As you tighten, the gutter may lift slightly, which is desired. After tightening all loose fasteners, step back and look at the gutter profile. It should be straighter.
Test the gutter by running water from a hose. If water now flows toward the downspout instead of pooling, tightening has fixed part of the problem. If water still pools, you have a pitch issue or need additional hangers.
Tighten fasteners on a dry day when metal is cool. Metal expands and contracts with temperature, and fasteners tightened when hot may loosen as the metal cools ([nist.gov](https://www.nist.gov/publications/shear-and-tension-bending-fatigue-test-methods-threaded-airframe-fasteners)).
Step 4: Add New Hangers Where Needed
If tightening existing hangers doesn’t fully resolve the sag, or if you identified missing hangers or excessive spacing, add new ones. The goal is to reduce the span between hangers to 24 to 32 inches.
Decide where new hangers should go. If you have a 48-inch span between two existing hangers, add a new hanger in the middle (24 inches from each). If you have a missing hanger, install a new one in that location.
Mark the location on the fascia with a pencil. Use a level to ensure the hanger will sit plumb. Drill a pilot hole if required by the hanger type, using a bit slightly smaller than the fastener diameter. Install the fastener according to the hanger manufacturer’s instructions. Tighten snugly but don’t over-tighten.
After installing new hangers, re-run water through the gutter to check pitch and drainage. The gutter should be straighter and water should flow more freely.
If you drill into fascia and hit water damage or soft spots, stop immediately. The fascia is compromised and needs repair before the gutter can be properly supported.
How to Re-Pitch Gutters for Proper Drainage
Even with solid, properly-spaced hangers, a gutter won’t drain correctly without proper slope. The standard pitch for residential gutters is 1/4 inch of drop for every 10 feet of horizontal run. A 20-foot run needs a 1/2-inch drop from the high end to the low end where the downspout connects.
To check current pitch, use a laser level or torpedo level. Place the level on the gutter bottom. The bubble should be slightly off-center, tilted toward the downspout. If centered, the gutter is level with no pitch. If tilted the wrong direction, the gutter is pitched away from the downspout.
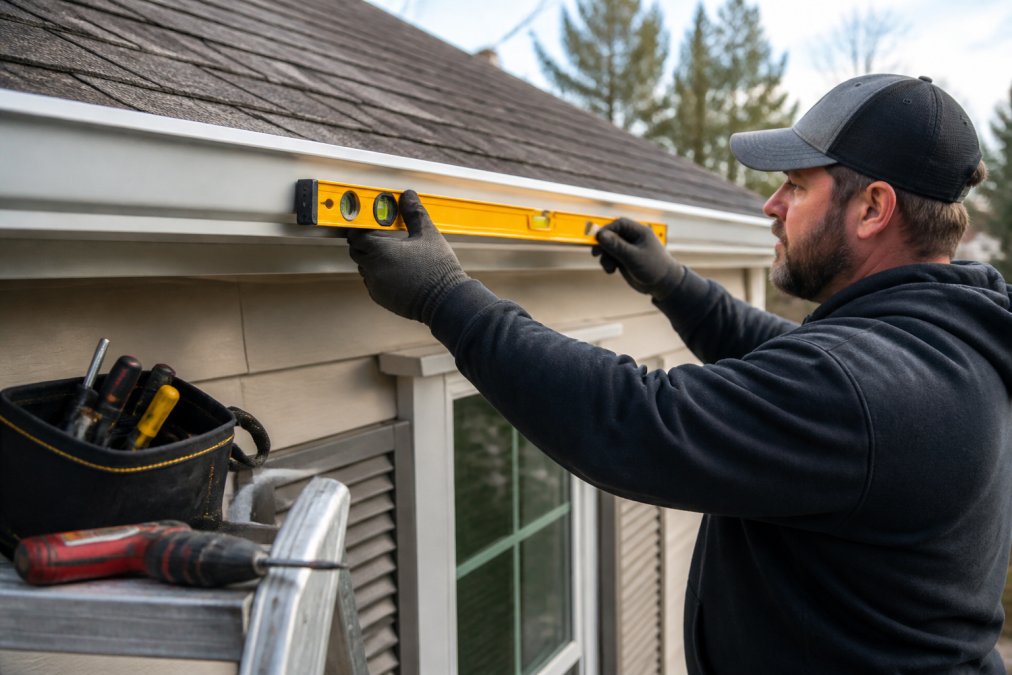
To correct pitch, adjust the height of hangers. Loosen fasteners slightly and lower or raise the gutter by 1/8 inch at a time. Make small adjustments and check with the level after each one. Some hangers have slots or adjustment holes that let you move the gutter without removing it completely.
After adjusting pitch, run water through the gutter again. Water should flow smoothly toward the downspout with no pooling. For long runs (over 40 feet), consider a two-way pitch that slopes toward a downspout in the middle, preventing water from traveling too far.
Best Tools for Gutter Repair
The right tools make gutter repair faster, safer, and more accurate.
For Inspection and Cleaning:
A quality gutter scoop with a curved edge that fits the gutter profile is essential. A stiff brush helps dislodge stubborn sediment. A headlamp or clip-on work light lets you see into gutters and under the fascia where shadows hide corrosion.
For Measurement and Leveling:
A laser level is faster and more accurate than a torpedo level for long runs. A measuring tape with a locking mechanism (25 feet minimum) is essential for spacing hangers correctly.
For Fastening:
An impact driver or cordless drill with socket attachment speeds up fastener installation. A socket set with metric and SAE sizes covers most hanger bolts. A multi-bit screwdriver handles different fastener types. Adjustable wrenches are lighter and more versatile than fixed wrenches for ladder work.
For Safety:
A sturdy extension ladder rated for your weight plus tools is non-negotiable. Ladder stabilizers keep the ladder from damaging the gutter and give better access. A tool belt keeps your hands free and prevents dropped tools.
Understanding Gutter Hanger Replacement Cost
Gutter hangers are inexpensive relative to the cost of water damage. A single replacement hanger typically costs between standard industry pricing, though exact figures vary by hanger type and material.
The real cost of gutter repair is your time and effort, not materials. If doing the work yourself, the main expense is the ladder, tools (if you don’t already own them), and a few hours of labor. If hiring a professional, labor is the largest component.
For homeowners in the Liberty Twp area who prefer professional help, DGK Home Solutions can assess your gutter system, identify failing hangers, and recommend the most cost-effective repair approach. We often fix sagging gutters without full replacement, saving you money compared to replacing the entire system.
When deciding between DIY repair and professional service, consider: roof height (second-story gutters are riskier), gutter run length (longer runs take more time), and your comfort working on a ladder at height. If uncertain about any step, get a professional assessment.
Gutter hanger replacement is one of the most cost-effective gutter repairs you can make. A few new hangers and fasteners cost far less than addressing water damage from a failed gutter system.
Common Mistakes to Avoid
Not cleaning before assessing. You can’t see true pitch, identify loose hangers accurately, or spot corrosion under debris. Always clean first, then assess.
Over-tightening fasteners. Cranking down hard doesn’t make fasteners more secure; it often strips threads or bends hangers. Snug is tight enough. If a fastener won’t tighten with moderate pressure, the hanger or fascia may be damaged.
Ignoring pitch problems. If you tighten hangers but don’t address pitch, water will still pool and the problem will return. Always verify pitch with a level before considering the job complete.
Spacing new hangers too far apart. Hangers should be no more than 32 inches apart. Space them correctly when adding new ones.
Installing hangers into rotted fascia. Rotted wood can’t hold fasteners securely. If you discover soft or crumbling fascia, stop and address that first.
Assuming all sagging is from hangers. Sometimes gutters sag because the fascia board itself has settled or warped. If you correct hangers and pitch but the gutter still sags, the underlying structure may need attention.
Forgetting to check downspout flow. A clogged downspout can back water up into the gutter, creating pooling that looks like a pitch problem. Always clear downspouts as part of your inspection.
When to Call a Professional
DIY gutter repair works well for straightforward problems: loose fasteners, adding a few hangers, or adjusting pitch. But some situations call for professional help.
Call a professional if the fascia board is rotted or soft. Fascia repair is structural work affecting your home’s exterior integrity and requires proper carpentry.
If your gutter system is severely corroded or hangers are rusted beyond tightening, replacement may be more practical than repair. A professional can assess whether repair or replacement makes sense for your situation.
If you’re uncomfortable working at height, have a steep or high roof, or lack the tools to do the job safely, hire a professional. Gutter work involves ladder work, and falls are serious.
If you’ve attempted repair and the gutter still sags after tightening hangers and adjusting pitch, there may be structural issues with the roof line or fascia that aren’t visible from simple inspection. A professional can diagnose what’s really happening.
For homeowners in Liberty Twp and the surrounding Greater Cincinnati area, DGK Home Solutions has over 20 years of experience diagnosing and repairing gutter problems. We can assess whether your sagging gutters can be fixed with hanger repair or need replacement, and we handle the insurance claim process if storm damage is involved.
Sagging gutters signal that something in your drainage system isn’t working. Most sags can be fixed by tightening loose hangers, adding hangers where spacing is too wide, and adjusting pitch for proper drainage. If you’ve tried these steps and the problem persists, or if you discover fascia damage during inspection, it’s time to call a professional. DGK Home Solutions offers free assessments and honest recommendations, we’ll tell you exactly what your gutters need and whether repair or replacement makes sense for your home. Get a free quote for gutter repair or replacement
Frequently Asked Questions
Q: Can you fix sagging gutters yourself?
A: Yes, many homeowners can fix sagging gutters themselves if the issue involves tightening hangers or adding new ones. Start by cleaning debris, inspecting hangers, and tightening bolts. However, if gutters are severely damaged, bent, or pulling away from the fascia, professional repair is safer and more effective. Work at heights requires proper equipment and experience to avoid injury.
Q: How do you tighten gutter hangers?
A: Use a wrench or socket set to tighten the bolts or screws on existing hangers. Work along the gutter line, checking that hangers are spaced 24-32 inches apart and securely fastened to the fascia board. Tighten gradually and evenly to avoid over-tightening, which can crack or dent the gutter. Ensure the gutter sits level or slopes slightly toward downspouts for proper drainage.
Q: What causes gutters to sag away from the house?
A: Gutters sag due to loose or corroded hangers, inadequate hanger spacing, debris buildup adding weight, or foundation settling. Water pooling from poor pitch also stresses the system. Over time, hangers loosen from vibration and weather exposure. Older homes may have hangers spaced too far apart, causing the gutter to dip between supports. Regular maintenance prevents most sagging issues.
Q: When should you replace gutters instead of repairing them?
A: Replace gutters if they show severe rust, multiple holes, large dents affecting water flow, or structural damage from storm impact. If the gutter is more than 20 years old and sagging persists after hanger repair, replacement may be more cost-effective long-term. Consult a professional to assess whether repair or replacement better serves your home's needs and budget.
This article was written using GrandRanker